Do-It-Yourself: Make Your Own Vitamin C Facial Serum
 |
| Do-It-Yourself: Make Your Own Vitamin C Facial Serum |
Heyya ladies!! I cannot contain my excitement
while I am writing this post. You may have seen our DIY section where we made face cleansers, toners, de-tanners etc at our home. However, this is something
I had never tried before and that is why I am super excited. We all know how
much importance the tiny bottles of “serums” have gained recently. Serums are
generally applied after cleansing your face and before application of moisturizer.
They offer targeted solutions to various skin problems like aging,pigmentation, pimples, marks, blemishes etc: Each serum doing one or two
particular jobs. As exciting as it may sound, but unfortunately, serums cost a
BOMB mostly. They are atleast 3 or 4 times costlier than your regular
moisturizer (sometimes even more!) I am in my mid-twenties now and wanted to
include a serum in my routine. As always, I couldn’t bring myself to spend so
much on a tiny bottle and decided to make one myself! Read on to find more:
Why I
chose to make Vitamin C serum?
Vitamin C is known to be the best anti-oxidant
for your skin. It brightens skin, fights blemishes and slows down ageing. But unfortunately,
Ascorbic Acid (Vitamin C) is unstable and loses all its potency when stored for
too long. So it is highly possible that the high-priced Vitamin C serums have
long lost their actual effects even before the bottle reaches your dresser. So,
I decided that one way to avoid that will be making my own vitamin C serum in
small batches that I can use up in a week and then make a fresh batch again.
My skin type: Dry to Normal
Skin concerns: Hyper-pigmentation around mouth
and forehead
Let’s see what all we would need to make this
magic potion:
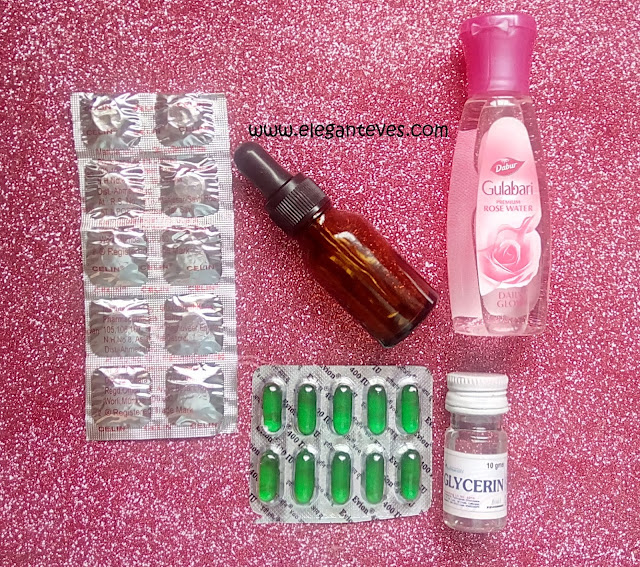
1. A clean tinted
glass bottle with dropper. (You may use any old medicine bottle from your kit
after sterilizing it. I got mine from ecotokri.com)
 |
| Do-It-Yourself: Make Your Own Vitamin C Facial Serum |
2. Vitamin C
tablets (Since pure Ascorbic acid is hard to procure, I have used Celine 500mg
Tablets by Glaxo)
3. Vitamin E
capsules (I have used Evion 400mg Capsules)
4. Glycerine
5. Rose Water
(You may also use distilled water)
 |
| Do-It-Yourself: Make Your Own Vitamin C Facial Serum Ingredients |
Steps:
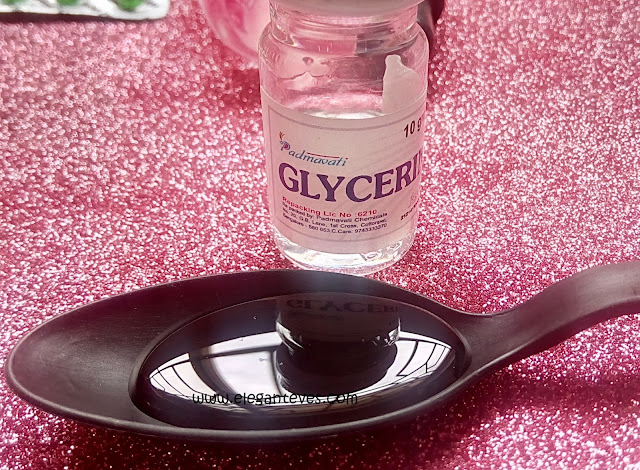
1. Add a teaspoonful
of glycerine into the sterilized bottle. Use three-quarter of the spoon if it
is a larger size.
 |
| Do-It-Yourself: Make Your Own Vitamin C Facial Serum |
2. Add two
spoonfuls of Rose Water/distilled water into the bottle
 |
| Do-It-Yourself: Make Your Own Vitamin C Facial Serum |
3. Shake both the
liquid together and now drop in two tablets of Celine. If your bottle is a 15ml
one like mine, you would need to break the tablets into half. Don’t bother
powdering the tablets because they will melt anyway.
 |
| Do-It-Yourself: Make Your Own Vitamin C Facial Serum |
4. Gently keep
shaking the bottle until the tablets dissolve. You might see powdery grains
around the inner walls of the bottle but they will melt soon. Don’t worry!
 |
| Do-It-Yourself: Make Your Own Vitamin C Facial Serum |
5. Finally, use a
clean needle or safety pin to pierce holes into two Vitamin E capsules and
squeeze the oil into the bottle.
 |
| Do-It-Yourself: Make Your Own Vitamin C Facial Serum |
6. Shake, shake ,
shake baby ;) Store the bottle in a cool, dark place away from sunlight when done.
 |
| Do-It-Yourself: Make Your Own Vitamin C Facial Serum |
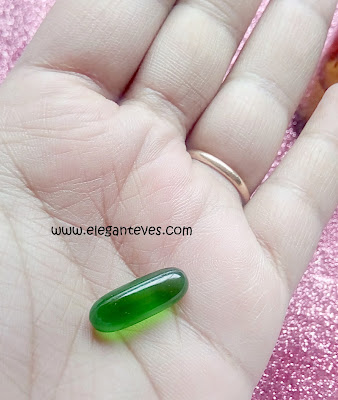
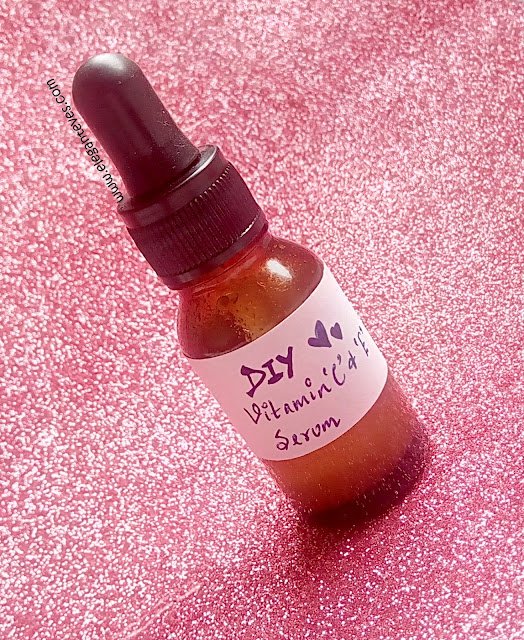
Your very own Vitamin C and Vitamin E serum is
ready :D The quantity should last for about a week when used daily before
bedtime. The bottle will require a shake before every use because there might
be some sedimentation. The serum will appear whitish inside the bottle but will
be clear like this when on your palm.
 |
| Do-It-Yourself: Make Your Own Vitamin C Facial Serum |
Points NOT to be ignored:
1. Make sure you
don’t contaminate the bottle or any of the ingredients by touching them
unnecessarily while pouring them into the bottle.
2. Always test
the serum on your inner elbow and back of your ears for any sensitivity before
you apply to you entire face and neck. Wait for 24 hours to see signs of
irritation.
3. People with
highly sensitive and broken skin (wounded or open scars) should avoid this.
4. Oily skin
people can lessen the quantity of glycerine to half teaspoon and Vit E capsules
to one instead of two.
5. You may also
make this serum with one tablet each of Celine or Evion and later on increase
the potency once your skin adjusts to this serum in a week.
6. Don’t step out
in sun with this serum. This is strictly for bedtime and please use sunscreen
before you face the sun next day.
Now, coming to the cost of making this serum:
I paid Rs.50 for the bottle and Rs.71 for rose
water, glycerine, Celine and Evion. And I can still make about 5 batches with
the amount of ingredients left. So, essentially, this first bottle costed me
Rs.121 and every next batch will mean one bottle for less than Rs.50. How cool
is that ;)
I shall be using this serum for two months and
then update this space for developments and results. But for now, I had applied
this serum last night on cleansed face last night and this morning I woke up to
smooth and supple skin :D The glycerine does make it tad tacky ever so slightly
but I don’t mind that at all. My skin didn’t break out into angry red pimples
and I feel fresh and there is no oiliness. A slight tingling sensation is felt initially for two to three seconds after application but that feeling subsides very soon.If you feel any discomfort then please discontinue use.
 |
| Do-It-Yourself: Make Your Own Vitamin C Facial Serum |
Whether you want to wait for two months to see
my results and then make it for yourself or you would like to make it right now
is entirely your call. But I just had to share this recipe with you all now :D
Stay tuned to this space for more interesting
stuff!


0 comments